Follow Along!
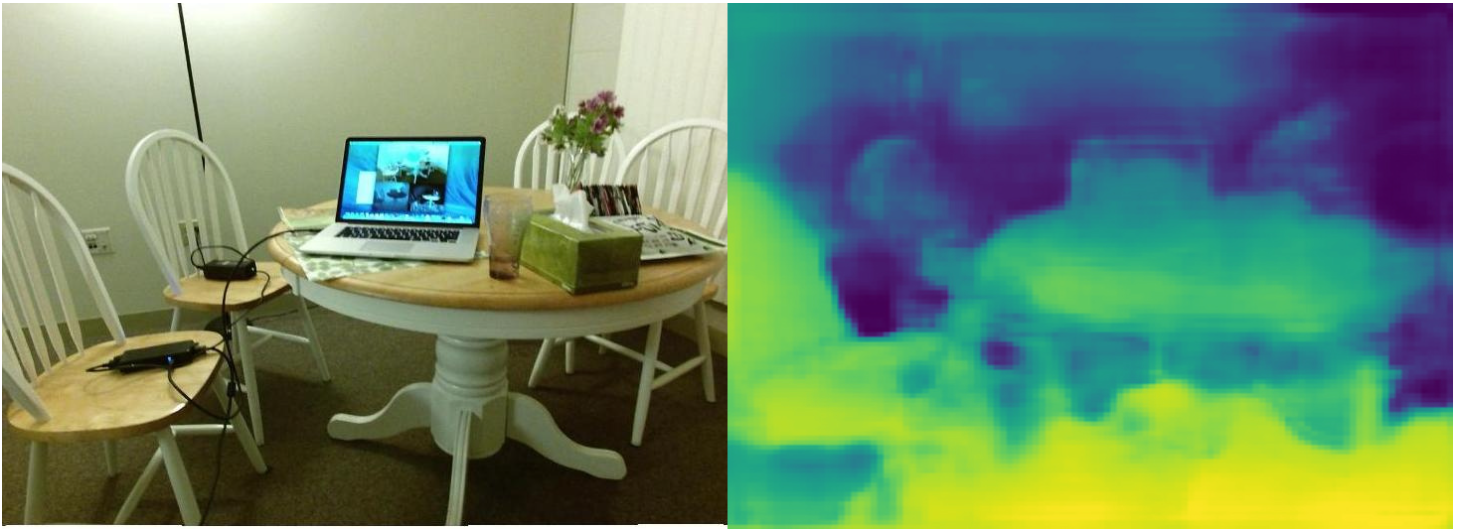
Follow along: Depth Estimation Example
The program launching process along with parameter settings are all simplified and set up on the Jupyter Notebook Environment.
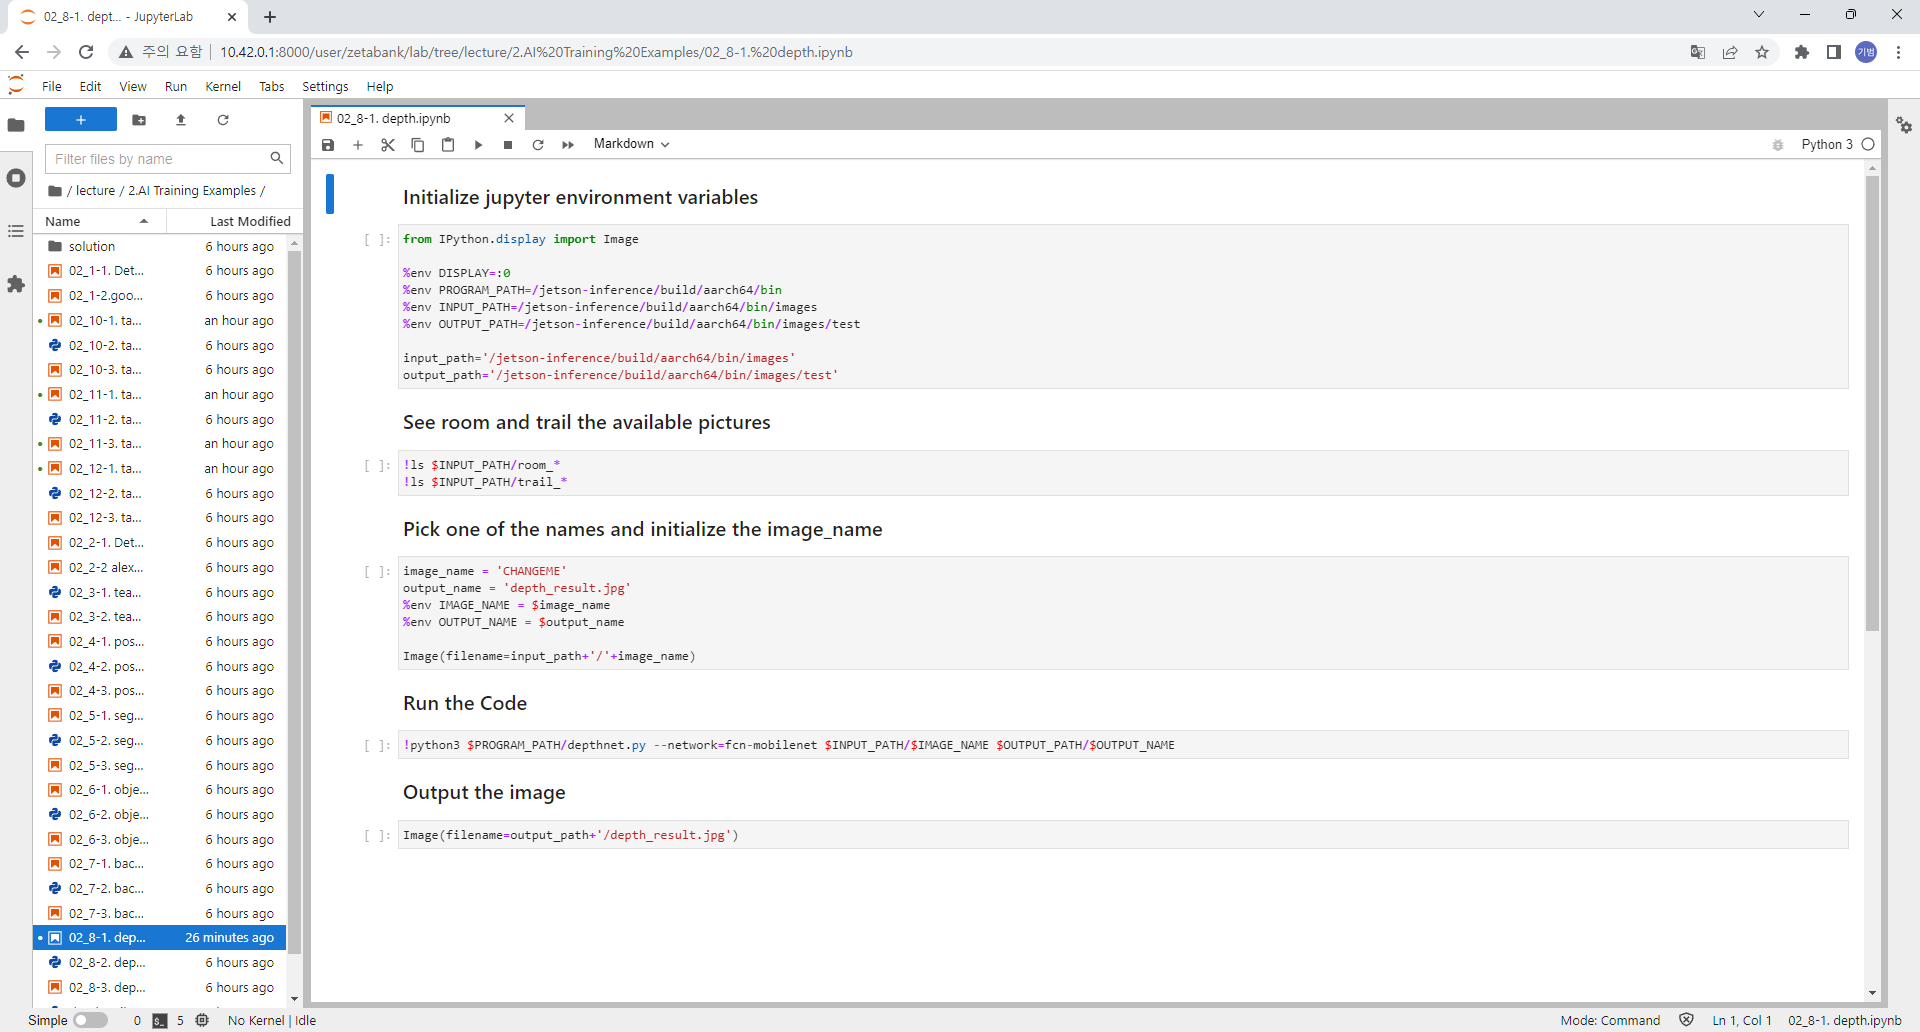
- Open the depth.ipynb jupyter notebook
- Initialize your output stream, and your path, and import in the Image library
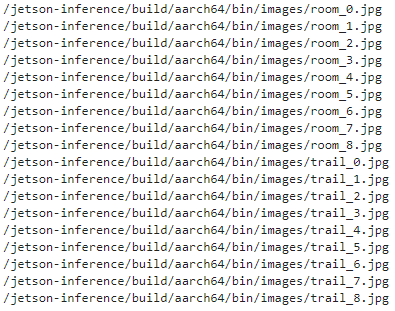
- Check all the available room and trail pictures within the system
- Pick one of the image with (room and trail) and initialize the image/ output name.
- Execute Depth on the chosen picture
- Display the result
(The Jetson Board used for these examples are => Jetson Nano)
02_8-1. depth.ipynb
- Running the cell codeCtrl + Enter
Initialize your output stream, and your path, and import in the Image library
from IPython.display import Image

%env DISPLAY=:0
%env PROGRAM_PATH=/home/zeta/jetson-inference/build/aarch64/bin
%env INPUT_PATH=/home/zeta/jetson-inference/build/aarch64/bin/images
%env OUTPUT_PATH=/home/zeta/jetson-inference/build/aarch64/bin/images/test

input_path='/home/zeta/jetson-inference/build/aarch64/bin/images'
output_path='/home/zeta/jetson-inference/build/aarch64/bin/images/test'
Check all the available human pictures within the system
!ls $INPUT_PATH/room_*
!ls $INPUT_PATH/trail_*
Pick one of the image with human(s) and initialize the image/ output name.
image_name = 'ChangeMe'
output_name = 'depth_result.jpg'
%env IMAGE_NAME = $image_name
%env OUTPUT_NAME = $output_name

Image(filename=input_path+'/'+image_name)
Guess the pose!
%%capture
!python3 $PROGRAM_PATH/depthnet.py $INPUT_PATH/$IMAGE_NAME $OUTPUT_PATH/$OUTPUT_NAME
Show the resulting image
Image(filename=output_path+'/depth_result.jpg')